Going Legit!

I finally decided to buy my domain and go legit with this.  But hey, guess what?  It’s ridonculously hard.  Especially if you don’t want to pay someone to do it for you and you know nothing about code.  So, while I go teach myself code (shut up, for real, I am), bare with me if the site starts looking like shit.  It will hopefully only be temporary.  Hopefully.

Catch you on the legit side!

Vegetarian Fajita Tacos

DSC_0205_01

These are using my Whole Wheat Protein Tortillas I posted earlier.  I was originally not going to post this because I felt like it was just vegetables in a tortilla, but Justin said people like recipes.  I guess I trust him.  We’ve been together for a while now, I think I owe him that.

Recipe:

2 white onions (sliced, caramelized) 
1 red pepper (sliced, roasted)
1 green pepper (sliced, roasted) 
3 jalapeno or serrano peppers (diced, roasted) 
1/2 cup corn
1 15 oz can black beans (or 1.5 cups cooked beans)
1-2 tsp oil
salt

Toppings:

Greek yogurt
salsa
avocado
lettuce

First we’re going to slice our onions.  People get all weird about onions.

They’re like, “No, I’m going to cry.”

And, “Oh my god, my breath.”

I read all sorts of forums about people complaining about onions and crying all that stuff.  People come up with the silliest solutions to avoid this problem — goggles, freezing the onion, soaking the onion in water, cut near a flame.

Silly business.

When you cut into an onion you’re breaking cell walls, inside those cell walls is a chemical compound called sulfoxide which is basically sulfur and oxygen bonded together with other compounds.  When we cut into an onion we release this and it turns into sulfuric acid, which then stimulates the tears in our eyes.  Mind you this is a bastardly simplified version, but enough for these purposes.  Anyway, the majority of the sulfoxides are contained near the root of the onion.  So if you leave the last 1/2 inch of the onion alone and cut with a sharp knife (which disrupts less walls) 9 times out of 10 you won’t have tears and chances are your breath won’t smell.

So quit your bitching and cut your onion.

DSC_0108_01

Leaving the root on, cut the very top of your onion of after you’ve halved it.  Make slices through your onion, making sure not to disrupt that last 1/2 inch.

image03

hyperink.com

Here’s a diagram.

DSC_0109_01

Then slice the root off.

DSC_0110_01

No tears!

And no freezing, flames, or goggles.

DSC_0115_01

Now we’re going to caramelize our onions.  This is a process.  Any person writing a recipe that tells you you can caramelize an onion in 5 or 10 minutes is a damn dirty liar and is never to be trusted again.  It takes minimum 30 minutes, but longer is always better.

Add 1-2 tsp oil to a pan and heat over medium heat.

DSC_0117_01

Add your onions and salt.  Cook over medium-medium high heat.  Don’t stir too often or you’ll prevent caramelizing.

DSC_0118_01

Every 10 minutes I deglaze the pan.  It’s up to you what you want to use–oil, vinegar, wine, water.  I just used water.

DSC_0132_01

While your onions are doing their thing get everything else ready.

DSC_0130_01

Roast your peppers, you can do it on the stove or in the oven.  On the stove or under the broiler is the fastest.

DSC_0133_01

Just make sure your skins are most, if not all the way black.

DSC_0139_01

20 minutes in, deglaze your pan if needed.

DSC_0134_01

Wipe or rinse of your skins.

DSC_0156_01

And slice.  Dice your serrano or jalapeno peppers if you’re using them.  Or you’ll pay for it.

DSC_0165_01

30 minutes in.  This is the bare minimum for caramelizing onions.  You could go all day with these beauties and they will only get more delicious.  But you do have to eat eventually, and I can only plan for a meal an hour or so in advance.

DSC_0144_01

Add your peppers, beans, and corn to your onions and toss around to warm everything.

DSC_0168_01

Get your toppings ready.

DSC_0175_01

And your tortillas.

DSC_0191_01

I love Greek yogurt and find it’s one of those things that is well worth the extra cost.

DSC_0198_01

Fixins.

DSC_0199_01

I decided to be cheap and buy iceberg lettuce.  Never again, once you grow accustomed to eating dark leafy greens you’ll wonder why the fuck this stuff even exists.

I’m sorry iceberg but it’s true, you’re a superfluous vegetable.

DSC_0200_01

The End.

Whole Wheat Protein Tortillas

DSC_0179_01

Tortillas are one of those things that once you make them, you’ll wonder why you haven’t all along.  I’ve been a loyal Mission girl since I knew what a tortilla was so I’m issuing myself some authority on tortillas.

13348138

These tortilla shells are obviously not the soft white flour tortilla shells of Mission, dare I say they’re better.  I do dare say.  I was convinced Justin was going to hate these and he loved them.  Side note: when Justin and I first met he was your typical college guy and hated pretty much all things healthy.  Now he’s salivating over a whole wheat soy tortilla.

Ladies, Cosmo was right, you can change your man.

Recipe: (makes 12) NutritionLabel (1)

1 1/2 cup whole wheat flour
1/2 cup soy flour
1/2 tsp salt
1 tsp baking powder
1 tbsp oil
3/4 cup water

Add your flours, oil, salt, baking powder to a bowl.

I’m adding soy flour here because I wanted to up the protein of the tortillas.  Soy flour has 10 g of protein per 1/4 cup compared to whole wheat’s 4 g.  The rule is you can replace up to 30% of your flour with soy flour and not run into problems.  You can do all whole wheat if you want but I find using solely whole wheat in any dish makes it too dense.  If I didn’t use soy flour I would have used all purpose.

DSC_0140_01

Mix together and add your water until it comes together.

DSC_0141_01

Turn out onto lightly floured surface and knead for 5 minutes.

DSC_0151_01

It won’t get elastic like a bread dough due to the lack of yeast.

DSC_0152_01

Portion into 12 equal balls. If you want to do tacos 12 is good.  If you want burritos, consider doing 8.

DSC_0153_01

Cover with a damp cloth or paper towel so they don’t dry out.

DSC_0154_01

Lightly flour your surface and flatten out ball with your hand.

DSC_0159_01

Roll out the rest of the way with a rolling pin.

DSC_0160_01

Mine were about 6 inches.  Cover back up with a damp cloth until you have made all the tortillas.  I stacked mine on top of each other and didn’t have a problem with sticking.

DSC_0164_01

Heat a skillet over medium-medium/high heat.  I didn’t bother with oil.

Heat the tortillas for 30 seconds on each side.  You’ll start to see bubbling.

DSC_0172_01

DSC_0173_01

I found these tortillas good enough to eat on their own, which is something I would never do with store bought tortillas.  I also realized how plastic-y the store bought ones taste after sitting in those bags for so long.

DSC_0188_01

We enjoyed ours as Vegetarian Fajita Tacos.

DSC_0205_01

Coffee Brittle

DSC_0452_01

I’ve ventured into the world of even healthier eating and let me tell you, it can be a scary, judgmental, exhausting place.  Suddenly everything gives you cancer and you’re a horrible person if you buy non organic.  I’ve found that I’m somewhere in the middle of people who don’t know or care anything about nutrition and people who are fucking obsessed with it and want the whole world to know about it.

So we have the health jerk nuts…

“Did you make sure this was organic?  Don’t you want to help the environment?  Do you even know how toxic pesticides are to the body?  Where is your tote?” 

I’m poor and I just wanted a pepper.  I promise when I’m a bajillionaire I’ll buy an organic farm and pay everyone double their average wage.  And I’m sorry I don’t carry my fucking tote everywhere I go.  Jeebus.

“You’re actually going to buy those crackers?  They don’t have a “non-GMO” label on them.  Here buy these, they cost three times as much but you’ll feel so much better about it.” 

And on the other side, non health nuts group you in with these health freaks and turn you into one of them.

“Oh they’re selling vegan, gluten free, sugar free cookies.  You’re skinny, I bet you would just love those.” 

I’ve never heard of a more depressing cookie.

“Why don’t you eat meat?  Humans are meant to eat meat you know.  You need a steak, you look a little peaked.”  

I’m sorry is there a sign above my head that says, “I’m trying to make a political statement”?

I’m just having an experience with this non fat Greek yogurt.

Guys I honestly forgot what the point of that first section was.  Oh yes, now I remember it veered tremendously.  But it took a long time so I’m keeping it.  The point of that intro was sugar, I know it was never brought up.  That’s my bad.  See those people talking in the intro, those aren’t people that I know, even though I’m sure they exist.  They’re the two nutritional sides of myself, well that last one is probably more my dad but whatever.

It’s like I’ve got my “id’ side wondering why I’m bothering with all this healthy eating crap, just wanting to eat whatever tastes good.  Paired with my douchey, judgemental “superego” making me second guess every food decision I make.  Meanwhile my “ego,” who apparently identifies as a young male, is caught in the middle wondering what the hell to do.

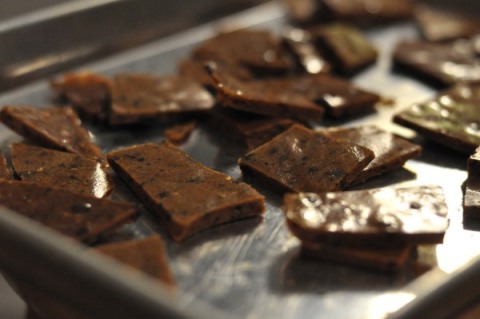
So that brings me to sugar and this post.  I used to make something similar to this coffee brittle concoction in high school before I became crazy health conscious.  It had been years since I made it and I all of a sudden got the urge for it.  But that judgmental side of me didn’t hesitate for a second.

“You’re going to make what? Candy!? Do you know how much refined sugar is going to be in that?  I guess you could make it sugar free, but that would mean artificial sweeteners and those are supposed to be even worse!”

Finally I got sick of myself for making myself feel guilty for wanting to consume sugar.  It doesn’t make me a bad person and it’s not going to be what kills me.

You know what’s going to kill me?  Stressing about every possible thing that could potentially kill me.

So here’s my coffee brittle recipe.  Yes it has sugar, yes it has calories, and yes I’m deciding it’s guilt-free.  And super yes to the question of how crazy I am.

Recipe:

1 cup white sugar
1/4 cup strong coffee
pinch of salt (no more than 1/8 tsp)
1 tsp baking soda
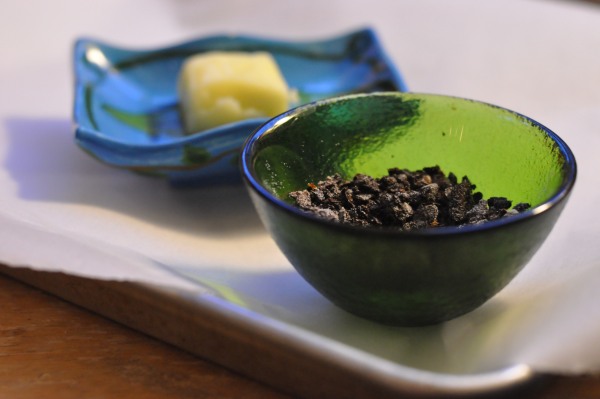
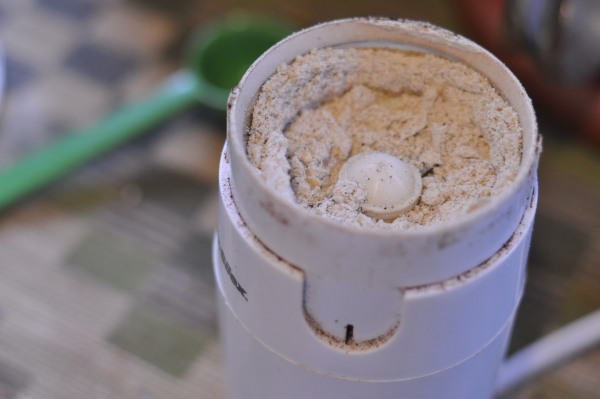
1 tbsp crushed coffee beans (ground are fine)
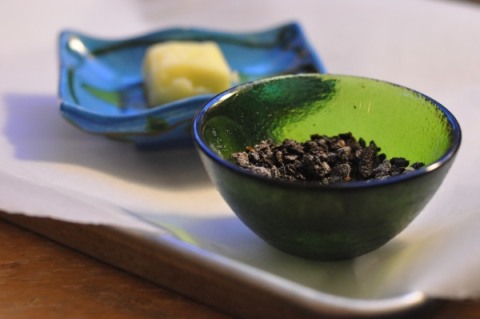
1 tbsp butter

Prep your butter, crushed beans, baking soda, and salt.  Also have a baking sheet covered in parchment or wax paper ready.

DSC_0423_01

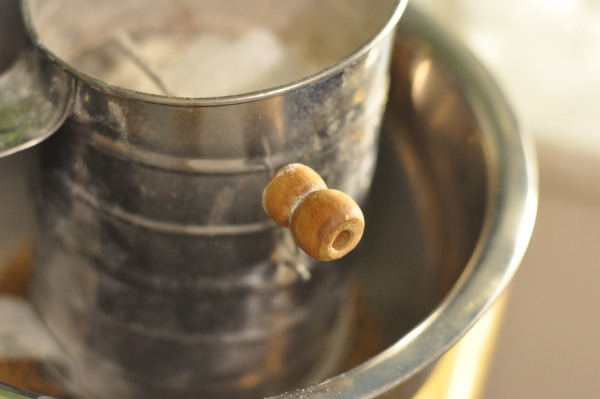
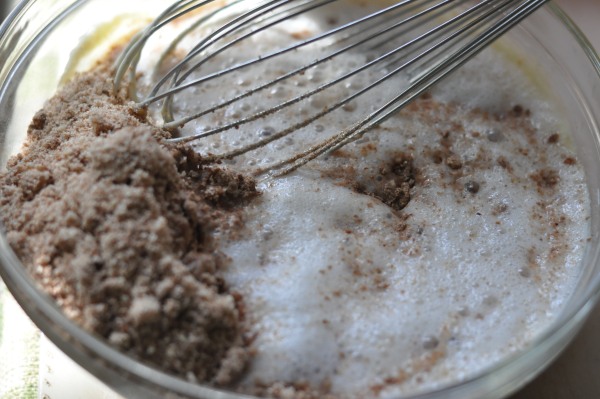
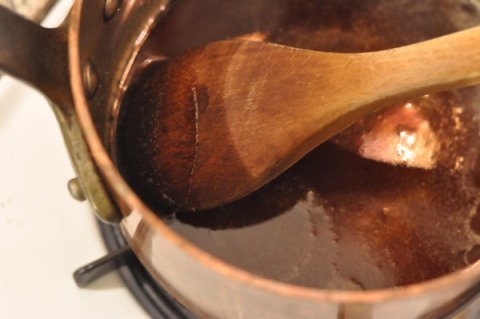
Add your sugar and coffee in a pot over medium low heat and stir until dissolved.

After the sugar has dissolved increase the heat to medium high and stir continuously until it reaches 300°.  Try not to splash too much on the sides of the pot, but if you do you can use a wet pastry brush to wash down the sugar granules.  Depending on how high you have your heat it should take about 5 minutes.

DSC_0427_01

As soon as it reaches 300° remove from heat.

DSC_0430_01

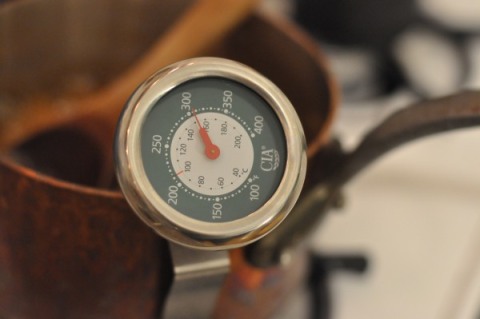
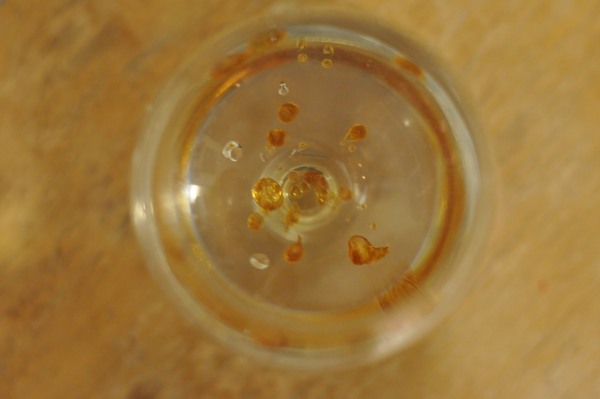
If you don’t have a thermometer don’t worry.  Get a class of water and periodically drop some of the mixture into the water.  If it hardens immediately and you hear a cracking sound, you’re good to go.  You should be able to pull it out and feel that it’s crunchy.

DSC_0432_01

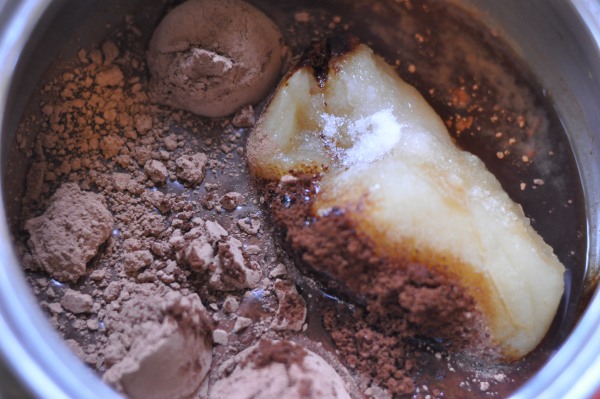
Immediately add your beans/soda/salt and butter.  Stir until combined.

DSC_0434_01

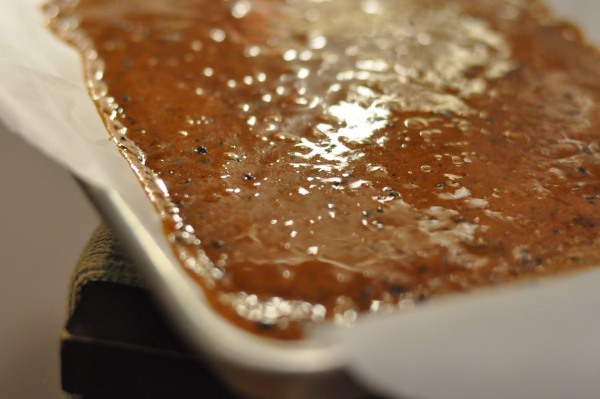
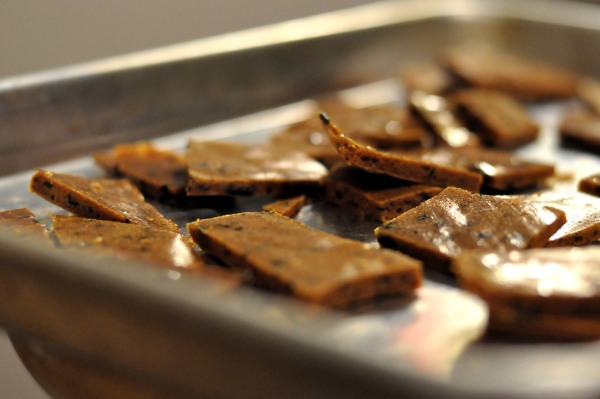
As soon as everything is combined pour it out onto your covered sheet.  It should spread out pretty much on its own but you can help it out with your spoon if you need.

DSC_0435_01

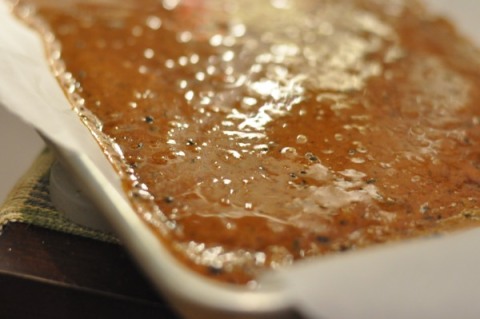
Allow to harden.  I forgot to time the cooling 30-60 minutes should be fine.  If it doesn’t harden after that then you didn’t cook it high enough.  You can try and put it back on the stove and recook it, but there’s no guarantees with that.

DSC_0436_01

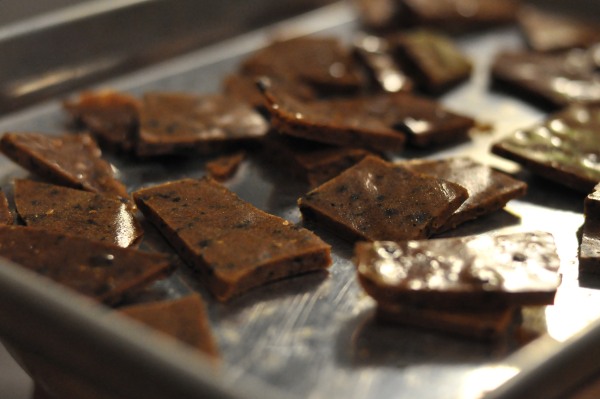
Break apart and store in an airtight container.

DSC_0455_01

Peach Bran Banana Bread

DSC_0097_01

The cereal aisle used to be a magical place for me.

All that sugar.  My diet practically consisted of it.

But then I realized I was not an elf and I couldn’t stick to the four main food groups: candy, candy canes, candy corns and syrup.

So I said farewell to my over-sugarized cereal.

And said hello to healthy-ish green-er living.

Don’t worry I got over it.

So I bought a box of All-Bran cereal because it looked really good and I am officially an old lady and I love poopin’.

Unfortunately I wasn’t jiving it as much as I thought I would (not pooping, the cereal) so now I’ve been throwing it into random baking creations.  Mind you, the cereal tastes fine I just thought the pieces were going to be bigger and it threw off the texture I had envisioned in my brain.

DSC_0041_01

Feel free to use Raisin Bran or whatever Bran cereal you have on hand for this.  Or if you’re super cool and you have plain wheat bran, use that.  Just increase the sugar amount by a little bit because the cereals contain sugars.

Recipe: (baking time: 1 hour)

1 1/2 cup whole wheat flour
1/2 cup all purpose flour
1 1/2 cup bran cereal*
1/2 cup applesauce (unsweetened)
3 tbsp brown sugar
1 tbsp white sugar
1 egg
2 bananas (mashed)
1 cup peaches (2, chopped- reserve 1/2 of 1 for topping)
1 tbsp baking powder
1/4 tsp baking soda
1 tsp vanilla
1/2 tsp salt
2 tsp cinnamon

*you can use plain wheat bran if you happen to have that, you may want to increase the sugar amount though

Preheat oven: 350°

Add your cereal or bran to a mixing bowl.

DSC_0043_01

Sift your flours, baking powder/soda, salt into the bowl.

DSC_0046_01

Mix.

DSC_0047_01

Chop your peaches.  Save half of one for your topping.

DSC_0053_01

Mash your bananas.  I use a whisk, I find the bread turns out better if you turn your bananas into a sludge rather than leaving chunks.

DSC_0052_01

Add your peaches and cinnamon and mash those together slightly.

DSC_0057_01

Whisk together your applesauce, vanilla, and brown sugar (save your white sugar for later).  Then add your egg.

DSC_0059_01

Whisk until just mixed.

DSC_0060_01

Add your flour mixture and then your banana mixture in chunks, ending with your banana.

DSC_0061_01

Don’t mix completely between each addition, there’s no need.

DSC_0062_01

End result.  This batter is a touch thicker than my other banana breads because of the bran.  If yours is too thick add a tbsp or two of milk or juice.

DSC_0066_01

Pour into greased bread pan and even out.

DSC_0067_01

Decorate with slices and sprinkle with remaining 1 tbsp of white sugar.  Sprinkling with the sugar on the top gives you that nice crust without having to add as much sugar throughout the whole batter.

If you’ve been following my blog from the beginning you’ll have noticed I started with adding 3/4 cup of sugar to my banana breads and now I’m down to 1/4 cup and they still taste sugary to me.  If you lower your consumption of it, your body stops craving it and it tastes stronger in smaller quantities.

DSC_0068_01

Bake in a 350° for 1 hour or until tester comes out clean.  Allow to cool 10 minutes before pulling out of pan.

DSC_0099_01

Enjoy!

DSC_0072_01

Autumn Chewy Granola Bars

DSC_0035_01

I’m calling these Autumn Chewy Granola Bars because they taste like fall to me and Fall Chewy Granola Bars just sounded weird.  They’ve got the nummy seasonings of a pumpkin pie without the pumpkin.  Eventually I’ll probably make a Pumpkin Chewy Granola Bar, which will negate these but whatever.  About August time I start craving Autumn-y things.  It’s mostly just the smell of cinnamon and nutmeg in warm beverages and copious amounts of pumpkin in any form.  Many of you start craving Pumpkin Spice Lattes from Starbucks and whatnot, others are fancy enough to make theirs at home.

Read: Cheap and picky as hell.  And has gotten to the point where, if they don’t make their food they can’t be satisfied with it.  But you know what, you got to start sharing the crazy in order to move past it.  Right?

Fuck, I hope so.

Anyhoozers.  These are some chewy granola bars that are nummy and good for you and not as sugary as many recipes you’ll find.  Much like my granola.  Instead of oil as a binder I use wheat puffs and water.  In execution it makes sense, but when you write it out, that sentence just sounds ridiculous.

Recipe:

3 cups oats (old fashion)
2 cups wheat cereal
1 tsp baking powder
1 egg white
1/4 cup water
1/4 cup cranberry juice
1/4 cup honey
1/2 cup sunflower seeds (roasted)
1/2 cup pumpkin seeds (roasted)
1/4 cup flax seeds (roasted)
1/2 – 3/4 cup dried cranberries/raisins
1/2 tsp salt
1 tsp vanilla
1/2 cup applesauce (unsweetened)
2 1/2 tsp cinnamon*
3/4 tsp allspice*
3/4 tsp nutmeg*
1 1/2 tsp ginger*

*Or your favorite pumpkin/apple pie spice

Preheat oven 350°

Prep your cereal, oats, seeds, and nuts on a baking sheet (or 2) and lightly roast.  10 minutes should do it depending on how heavily you crowd your sheet.  Make sure you check it every couple minutes and move stuff around to prevent burning.

DSC_0011_01

While that’s doing its thing turn your attention to your liquids and spices.  Add your egg white, honey, juice, water (you can use all juice if you want), vanilla, spices, and applesauce to a bowl.

DSC_0010_01

Mix.

DSC_0016_01

Your oven stuff should be done now.  It’s not going to get a rich color or anything, but you should start to smell it.  Add it to a mixing bowl.

DSC_0012_01

Add in your fruit.

DSC_0013_01

And baking powder/salt.

DSC_0015_01

Combine and add in your liquid.

DSC_0017_01

Stir until there are no dry oats left.

DSC_0018_01

Pour out onto greased cookie sheet (I weirdly don’t have one) or a 9×13 pan.  You can use parchment paper or something on the bottom to make it easier to remove the bars later, but I always find that kind of wasteful, both in product and time.

DSC_0019_01

Wet your hands and flatten the granola, pressing down firmly.  The denser it is the more likely it is to stay together when it’s baked.

DSC_0021_01

Dense.

DSC_0023_01

Bake in your 350° oven for 15-20 minutes until it looks golden-y and set.

DSC_0026_01

Allow to cool.  Completely is best, but I understand your impatience.

DSC_0027_01

Wrap individually and store in air tight container.  They’ll last longer in the fridge.

DSC_0038_01

Healthy Espresso Chunky Granola

DSC_0149_01

I have finally combined my two loves.  Granola and coffee.  All is right with the world.

Now I just need to get a picture of Tilda Swinton lying on a bed of it then I can die happy.

No creepin’.

Recipe: (baking time 1 hour)

3 cups oats (old fashion)
2 tbsp oat flour (ground oats) – can also use whole wheat flour
2 tbsp flax seed
1/2 cup almonds (raw, chopped)
1/4 cup sunflower seeds (raw)
3 tbsp cocoa powder
3 tbsp espresso powder
1/2 cup applesauce (unsweetened)
1/2 cup strong coffee – can also you water
1 tsp cinnamon (optional)
1 tsp vanilla
3/4 tsp salt
2 tbsp white sugar

Preheat oven: 300°

On Pinterest I saw people talking about how they didn’t want to add wheat flour to one of my granola recipes so they were adding some random flour I can’t think of right now.  Instead of going to all that trouble/money of buying some of obscure gluten free flour just grind up 2 tbsp of your oats in a blender, food processor, or be weird like me and do it in your coffee grinder.

Don’t judge me on my cheap coffee grinder, our $200 one broke (relax, we didn’t spend that much on it) and we couldn’t get ourselves to buy another nice one. 😦

DSC_0095_01

Oat flour!

DSC_0097_01

Add your oats, flour, seeds and nuts to a bowl.

DSC_0099_01

In a pot over low heat combine your cocoa powder, espresso powder, coffee, vanilla, applesauce, and cinnamon (I just love cinnamon and coffee together and have a hard time not adding them together).  Wait to add the salt and sugar.

I’ve started buying my applesauce in bulk (well just the bigger jars anyway) and freezing it in 4 oz sizes.  So that’s why it looks weird.  I used to buy it in those 4 oz tubs but you save a little bit when you buy it in the jars, those stupid jars just always go bad on me.  Hence the freezing.

I guess looking at the picture you probably wouldn’t have realized it was frozen and I didn’t need to explain that.  Oh well, maybe you’ll start freezing your applesauce too.

DSC_0102_01

Heat and stir until combined.  Add 1/2 tsp of salt  and 1 tbsp sugar.

Taste it!  Does it taste like ass?  Then fix it.  Whether or not it tastes good will entirely depend on your espresso/coffee because my recipe is flawless.  Just kidding, but no seriously.  Your espresso may require you to add a little bit more salt.  Salt neutralizes bitterness better than sugar so add 1/2 tsp salt and 1 tbsp sugar.  Taste it.  If you notice there’s not much of a bitter flavor, (it will still have a very strong coffee flavor, don’t confuse the two) then you’re good with the salt.   Add the other tbsp of sugar if you need it, I did.

My espresso powder was of the cheaper variety so I needed to add a little bit more salt to neutralize the not so pleasant bitterness (there’s a difference between pleasant bitterness and not so pleasant–and my stuff is cheap, I’ll admit that).

DSC_0105_01

Mix your dry ingredients together.  I forget this step all the time.  It’s annoying when you do.

DSC_0103_01

Pour your wet mixture into your dry.

DSC_0110_01

And mix until everything is thoroughly combined.

DSC_0113_01

Pour out onto a lightly greased baking sheet.

DSC_0115_01

Wet your hands and press down on the granola making it as flat as possible.  We’re going for around 1/4″ – 1/2″ thick.  Anymore than that and it’s going to take a lot longer to bake.

If you want more of a cluster thing then just loosely spread it around, but that’s stupid.

Bake in your 300° oven for 1 hour.

About 40 minutes in I pull the granola out and break apart the huge sheet into large chunks.  It will be soft but still stay together.  Flip around the chunks so pieces that were on the outside are now on the inside and sides that were touching the sheet are now exposed to the air.

Do you have to do this step?  No.  But you don’t have to make your own granola either.  Doing this allows the granola to bake faster and more evenly.  If you don’t, it will still bake it will just take around 2 hours and the sides will probably burn.

DSC_0116_01

Sexy.

DSC_0118_01

Perfect for days when you find yourself second guessing that 4th cup of coffee.  Who are we kidding?  Those days don’t exist.

Perfect for days that end in ‘y’.

DSC_0148_01

Roasted Tomatillo Pepper Salsa

DSC_0031_01

Justin likes to call posts like this my “Night Time Cooking Series.”  AKA my “Shit Light Set Up Series.”  I usually get the desire to bake or cook at about 10 or 11 at night.  That’s usually when the sun has long stopped being out and I’m too lazy to get out my umbrella light.  But not too lazy to make a batch of granola, banana bread, and salsa.  I know, I’m weird.

Anyway, tomatillos are in abundance at the farmer’s market so Justin has been bringing them home every weekend.  I had never made tomatillo salsa before this summer and now I love the stuff.  I put peppers in it because I have a hard time not putting peppers in things.

I like to keep this salsa really simple because the tomatillo has such a unique and complex flavor that you don’t want to mask.  At least I don’t.  There are other recipes that put coriander and cumin and green onion and chili peppers and oregano and other such nonsense in their salsas.  This salsa is about honoring the flavor of the tomatillo.

Recipe:

5 Tomatillos (broiled)
2 medium peppers (broiled, I’m using 3 small)
1/2 lime (juice)
1/2 red onion (broiled)
1 garlic clove (broiled)
1 tbsp cilantro (dried)
salt to taste

Optional:

1 Jalapeno or 1 serrano (broiled)

Turn on your broiler.  You can either broil these, roast them in the oven, or roast them on the stove top.  Some recipes tell you to boil the tomatillo, I wouldn’t do this.  You’re going to lose a lot of your flavor in the water that way and it mellows the flavor of the tomatillo.

Why would you do that?

You can also do everything raw, but roasting unlocks a depth of flavor that you wouldn’t experience otherwise.  Up to you.  Sometimes I have my red salsas raw, but a tomatillo is special, you should treat it as such.  If you do decide to have it raw, the salsa will be a lot more citrusy and you may want to forego the lime juice.

DSC_0001_01

Remove the husk from your tomatillos and wash.  Cut them in half along with your peppers.  Leave your garlic clove intact.

The purple peppers you see in the background, while they look fancy are nothing that special.  Their taste is similar to that of a green pepper and when they cook they turn an off white color.  Still, they’re pretty and fun to use from time to time.  If you get one that’s a merlot color then that will taste more like a red pepper.

While you may be tempted to be fancy and get a red or yellow pepper think about it before you do.  Tomatillos are sweet on their own and a red pepper is sweet.  If you want a very sweet salsa then this may be a good choice for you.  But the slight bitterness of an unripe pepper (read green or light purple in this case) helps to balance out that sweetness.

DSC_0003_01

Put everything cut side down on a baking sheet cut side down.  No need to oil.  You can lightly salt here.

DSC_0006_01

Broil for 5-8 minutes, I think I was 7 minutes here.  If you have a lot of numminess stuck on the bottom of your pan you can add your lime juice here to help remove it.  Salting before you broil will help avoid that though because the peppers and tomatillo will release a little bit more water.  Make sure you add this water loss into your blender later.

DSC_0009_01

Place in a bowl and cover for a couple minutes to let the steam work it’s magic and loosen the skin a bit.

DSC_0013_01

Add the juice of 1/2 a lime to your blender or processor along with your cilantro.

If you don’t like the taste of cilantro consider trying dried cilantro.  I find fresh cilantro a little over powering in most dishes but I don’t feel that way with dried.  So maybe it’s something you would like if you find yourself hating things with cilantro.

DSC_0008_01

Peel your garlic.  Add everything to your blender or food processor and blend.  Don’t worry about removing all the charred parts.  They give the salsa a subtle smokey flavor that balances out the acidic nature of the tomatillo.  If you’re worried about cancer then I guess remove the charred parts, but guess what, reading this post is giving you cancer, breathing gives you cancer.  Wake up and live your life and eat the damn charred parts of your tomatillos.  Even if they kill you’ll have died of something else long before…

Decide how smooth or chunky you want it to be.

DSC_0015_01

Salt to taste and enjoy.  If you want it with some spice add a jalapeno or serrano pepper in with your broiling.  While I love spicy salsas I feel the sweet, sour flavor of the tomatillo lends itself better to a non spicy salsa.

DSC_0018_01

Chocolate Zucchini Bread

DSC_0093_01

The base for this recipe is very similar to my banana breads.  So if you make it and wind up liking it you can check those out in the BREAKFAST section.  That being said this is even less sugary than my banana bread recipes.  I’m getting even more off the sugar wagon, not that I was ever really on it.  I guess I looked at it a little too hard sometimes, I don’t know.

I’m not eating much processed sugar these days is what I’m saying, I JUST WANT YOU ALL TO BE AWARE.

I’m kidding.

Yesterday, Justin brought home some summer squashes from the farmer’s market.   Now, I had never had a summer squash before and I barely eat zucchini.  I knew zucchini bread was a thing but  I realized I didn’t know exactly what he had brought home.

After some googling it turns out he brought home 1 zucchini, 1, crookneck, and 1 straightneck.

summer-squash

So what’s the difference?  It turns out not much of anything.  They’re used completely interchangeably in recipes and all that really differs is the color.  All are called summer squashes and they’re picked while still immature so their seeds and skins are still edible.  The only difference seems to be is yellows tend to have more seeds the larger they are, so look for small ones.

So short story shorter, don’t worry about what kind of summer squash you have, no one will be able to tell the difference anyway.

On to the recipe!

Recipe: (baking time: 1 hour) 

1 cup whole wheat flour
3/4 cup all purpose flour
1 tsp baking powder
1/2 tsp baking soda
1/4 tsp salt
1/4 cup cocoa powder
1 tsp instant espresso powder
2 tbsp brown sugar
2 tbsp white sugar
1 egg
1 tsp vanilla
1/2 cup applesauce (unsweetened)
2 cups summer squash (3 small ones)
1 tbsp chocolate chips

Preheat oven 350°

Sift or whisk together your flours, baking powder/soda, salt, and cocoa powder.

DSC_0047_01

In a large mixing bowl add your applesauce, sugars, espresso powder, and vanilla.

I usually use multiple kinds of sugar in my baking, I feel you get a better product that way.  Brown sugar makes it moist while white sugar gives it that firmer top at the end.  Granted we’re not adding that much but the idea is there.  If you want more of the effect add 1/4 cup of each, the rest of the recipe should be fine, you made need to add a tbsp or 2 of liquid at the end.

The instant espresso is optional, it just intensifies the chocolate flavor.

DSC_0049_01

Grate your squashes.

DSC_0053_01

Because these guys contain a lot of excess water you may want to strain them.  You don’t need them to be completely dry just squeeze the clump with your hand or something, just to get most of the liquid out.

DSC_0057_01

Add an egg to your sugar/applesauce mix and whisk until just combined.

DSC_0059_01

Now you’re going to add your flours and squash mix in chunks.

DSC_0060_01

You don’t need to stir thoroughly in between each addition.

DSC_0061_01

It’s kind of like a souffle mixing action.

DSC_0064_01

End with a squash addition.

DSC_0065_01

End result should be pour-able but not liquidy, thicker than a traditional cake batter.

Taste it!  If it’s not sugary enough for you consider sprinkling a tbsp or 2 of sugar after you put it in your pan.  I’m trying to lower my sugar desires and I found that was a good way to transition.

DSC_0066_01

Add a tbsp of chocolate chips if you want and bake in your 350° for 1 hour or until a tester comes out clean.

DSC_0068_01

Let it cool.  Give it at least 20 minutes or the poor thing with fall apart on you.

DSC_0070_01

Bread like this keeps for a day or two on the counter and up to a week in the fridge.

Enjoy!

DSC_0087_01

Chocolate Spelt Pancakes

DSC_0318_01

It’s fun buying a spiffy, tiny bag of a different grain you’ve never used before.  I’ve bought spelt flour before, but I’m just saying it’s fun if you haven’t.  Who am I kidding?  It’s fun even if you have.  I try and avoid the baking aisle at Whole Foods and stores of that nature because all those bags of flour are just too tempting  I can’t resist them.  They just look so fancy!  Oh and the packaging, they get me every time with the packaging.

LCFlourssmall

They’re just so pretty  I can’t handle it.

But then I remember I have no money for superfluous flour and I get a sad.

But then I remember that I had indulged in my flour desires a couple months ago and there is a bag of spelt flour in my pantry with 1 cup in it and that is exactly how much I need to make some spelt pancakes.

On to the pancakes!

Because I only had 1 cup of spelt flour I decided to add almond meal to this, which then made me want to add greek yogurt to up the protein factor even more.

Hey, look at me!  I got the Nutrition Facts thing going!

Recipe: (makes about 12 pancakes)  NutritionLabel

1 cup spelt flour
1/2 cup almond (raw, ground)
1 tbsp brown sugar
2 tbsp cocoa powder
1/4 tsp ginger powder
1/2 tsp cinnamon
1/4 tsp salt
1 tsp baking powder
1/4 tsp baking soda
1 egg
1 egg white
1/2 cup Greek Yogurt (I use 0%)
1 cup almond milk

Blend or process your almonds.  The 1/2 cup measurement was taken as whole almonds.

DSC_0294_01

When they start getting a good blend to them go ahead and add your spelt flour, baking powder/soda, salt, ginger/cinnamon, and cocoa powder.  These are a light cocoa flavor.  Feel free to add more if you like.  I don’t know it’s the morning, I don’t want to be smashed in the face with chocolate, even if it is low sugar.

The ginger and cinnamon is optional I just love ginger and cinnamon with cocoa powder and they’re all supposed to be good for digestion so why not eat them all together.

Spelt is also a lower gluten flour so it should be good for people with gluten sensitivities (not intolerance of course).  If you don’t have spelt, obviously feel free to substitute it with something else, your liquid needs may change slightly.

DSC_0296_01

Add your eggs to a bowl.  Remove one egg yolk to a separate bowl and do whatever you want with the other one.

DSC_0298_01

Add the brown sugar and greek yogurt to the single egg yolk and mix.

DSC_0300_01

DSC_0303_01

Add your milk to your egg whites and whisk until frothy.

DSC_0301_01

Frothy.  This step is skippable if you’re in a hurry or lazy, but if you’re either of those why are you making pancakes from scratch?  They do come in a box you know.

DSC_0302_01

Add your flour mixture to your yogurt mixture.  Usually I don’t stir these two together at this point to make sure I don’t over mix my batter but the almond meal got a little clumpy when I added my milk.  So I would stir these mixtures together at this point.

DSC_0304_01

Add your milk/egg froth.  Unlike me, you’ll have already mixed in your flour.

DSC_0305_01

Combine, being careful not to over work your batter.  I unfortunately had to over mix mine because the almond meal locked into tiny clumps.  So it negated the whole egg frothing thing.  Oh well, your pancakes will be better for it.

DSC_0307_01

Pour out onto lightly oiled or buttered pan.  I usually use butter but I decided to mix it up and use coconut oil.  I think the oil made it harder to regulate the heat in my pan, but I don’t know for certain.

I use a 1/4 cup measuring spoon to ladle the batter out and they’re the perfect size for us.

DSC_0310_01

I am still not a master pancake flipper.  One day.

DSC_0314_01

I have a secret to tell.  I may have already divulged this is another pancake post, but I don’t like maple syrup.  Never have.  I like to spread yogurt butter on my pancakes and sometimes when I’m feeling frisky, peanut butter.  And when I’m feeling extra frisky, nutella.

DSC_0321_01

This stuff.  I realize it’s mostly water and oil, but I love it.

0001111534004_500X500

Justin goes for a semi more traditional route and is topping his with agave nectar.  Enjoy!

DSC_0352_01